
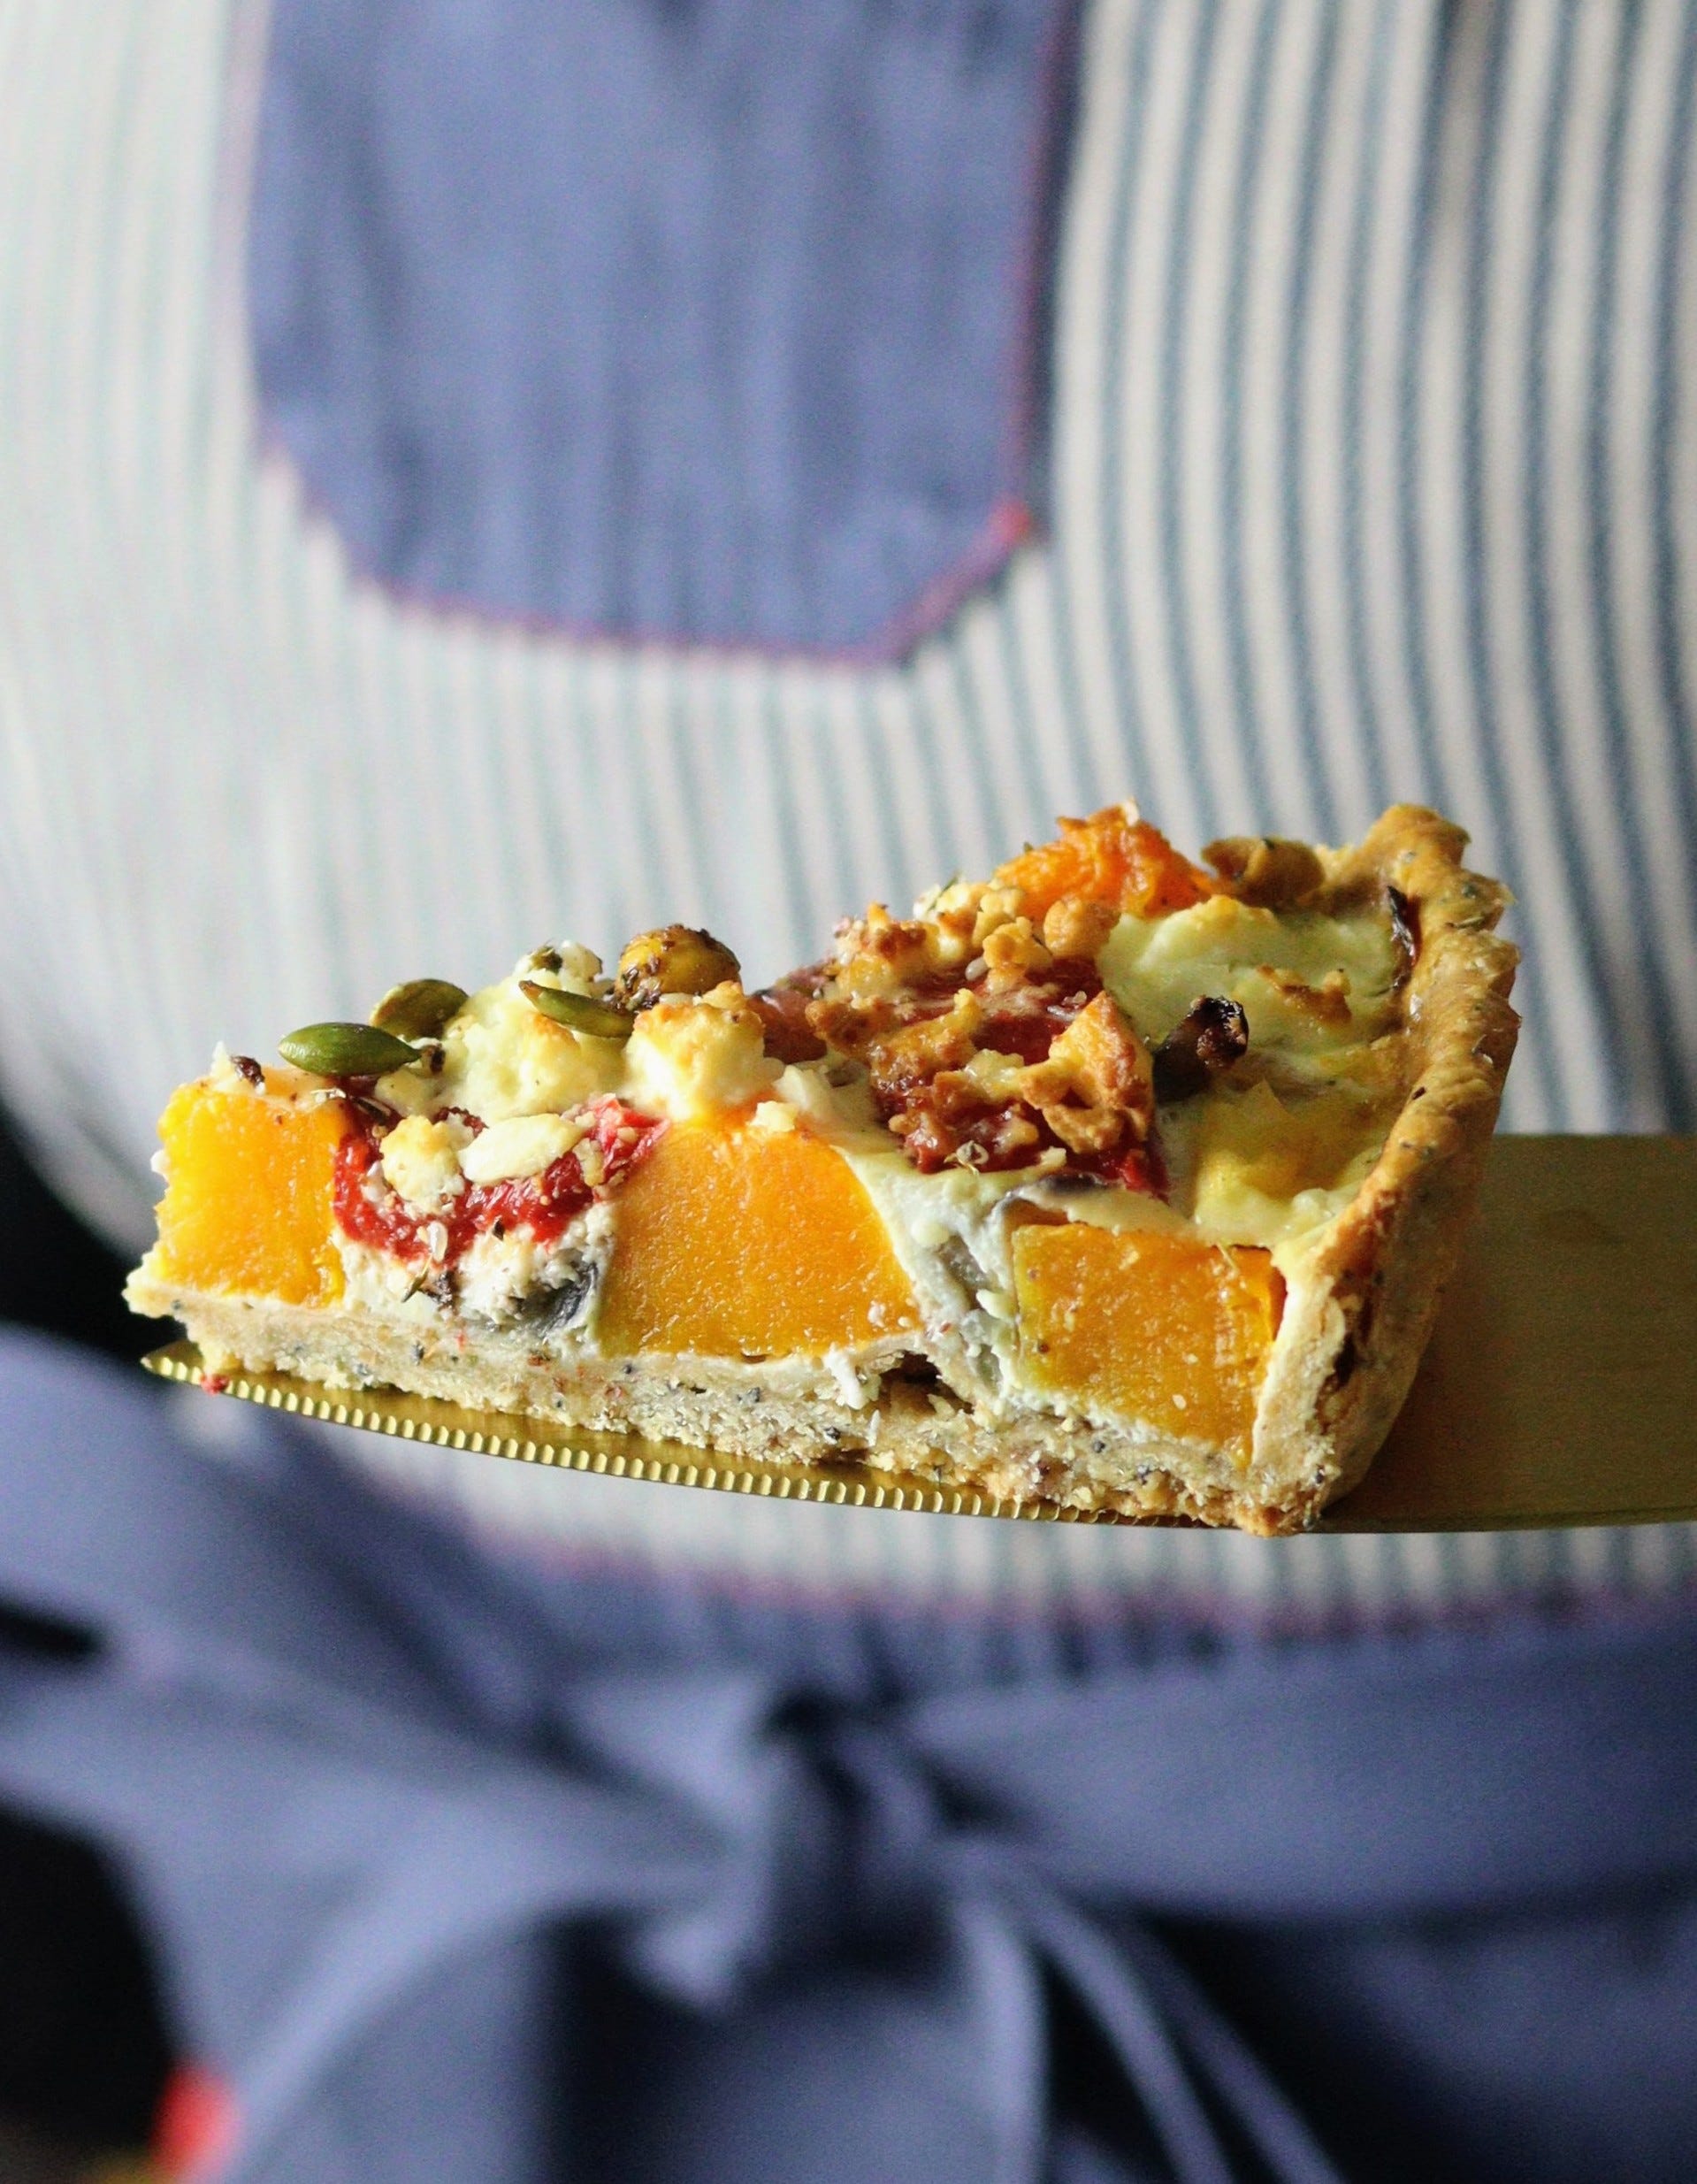
Butternut & Za'atar Tart
Plus, does freezing your tart case eliminate the need for blind baking?

Hello there and welcome back to Bake Experiments - a fortnightly newsletter on a mission to make high end baking easier, and healthier, for the home baker. With a smattering of food history, folklore and kitchen stories too.
I am so thrilled to have you here. And if you like what you read, please do press that heart, share, or subscribe. Thank you.
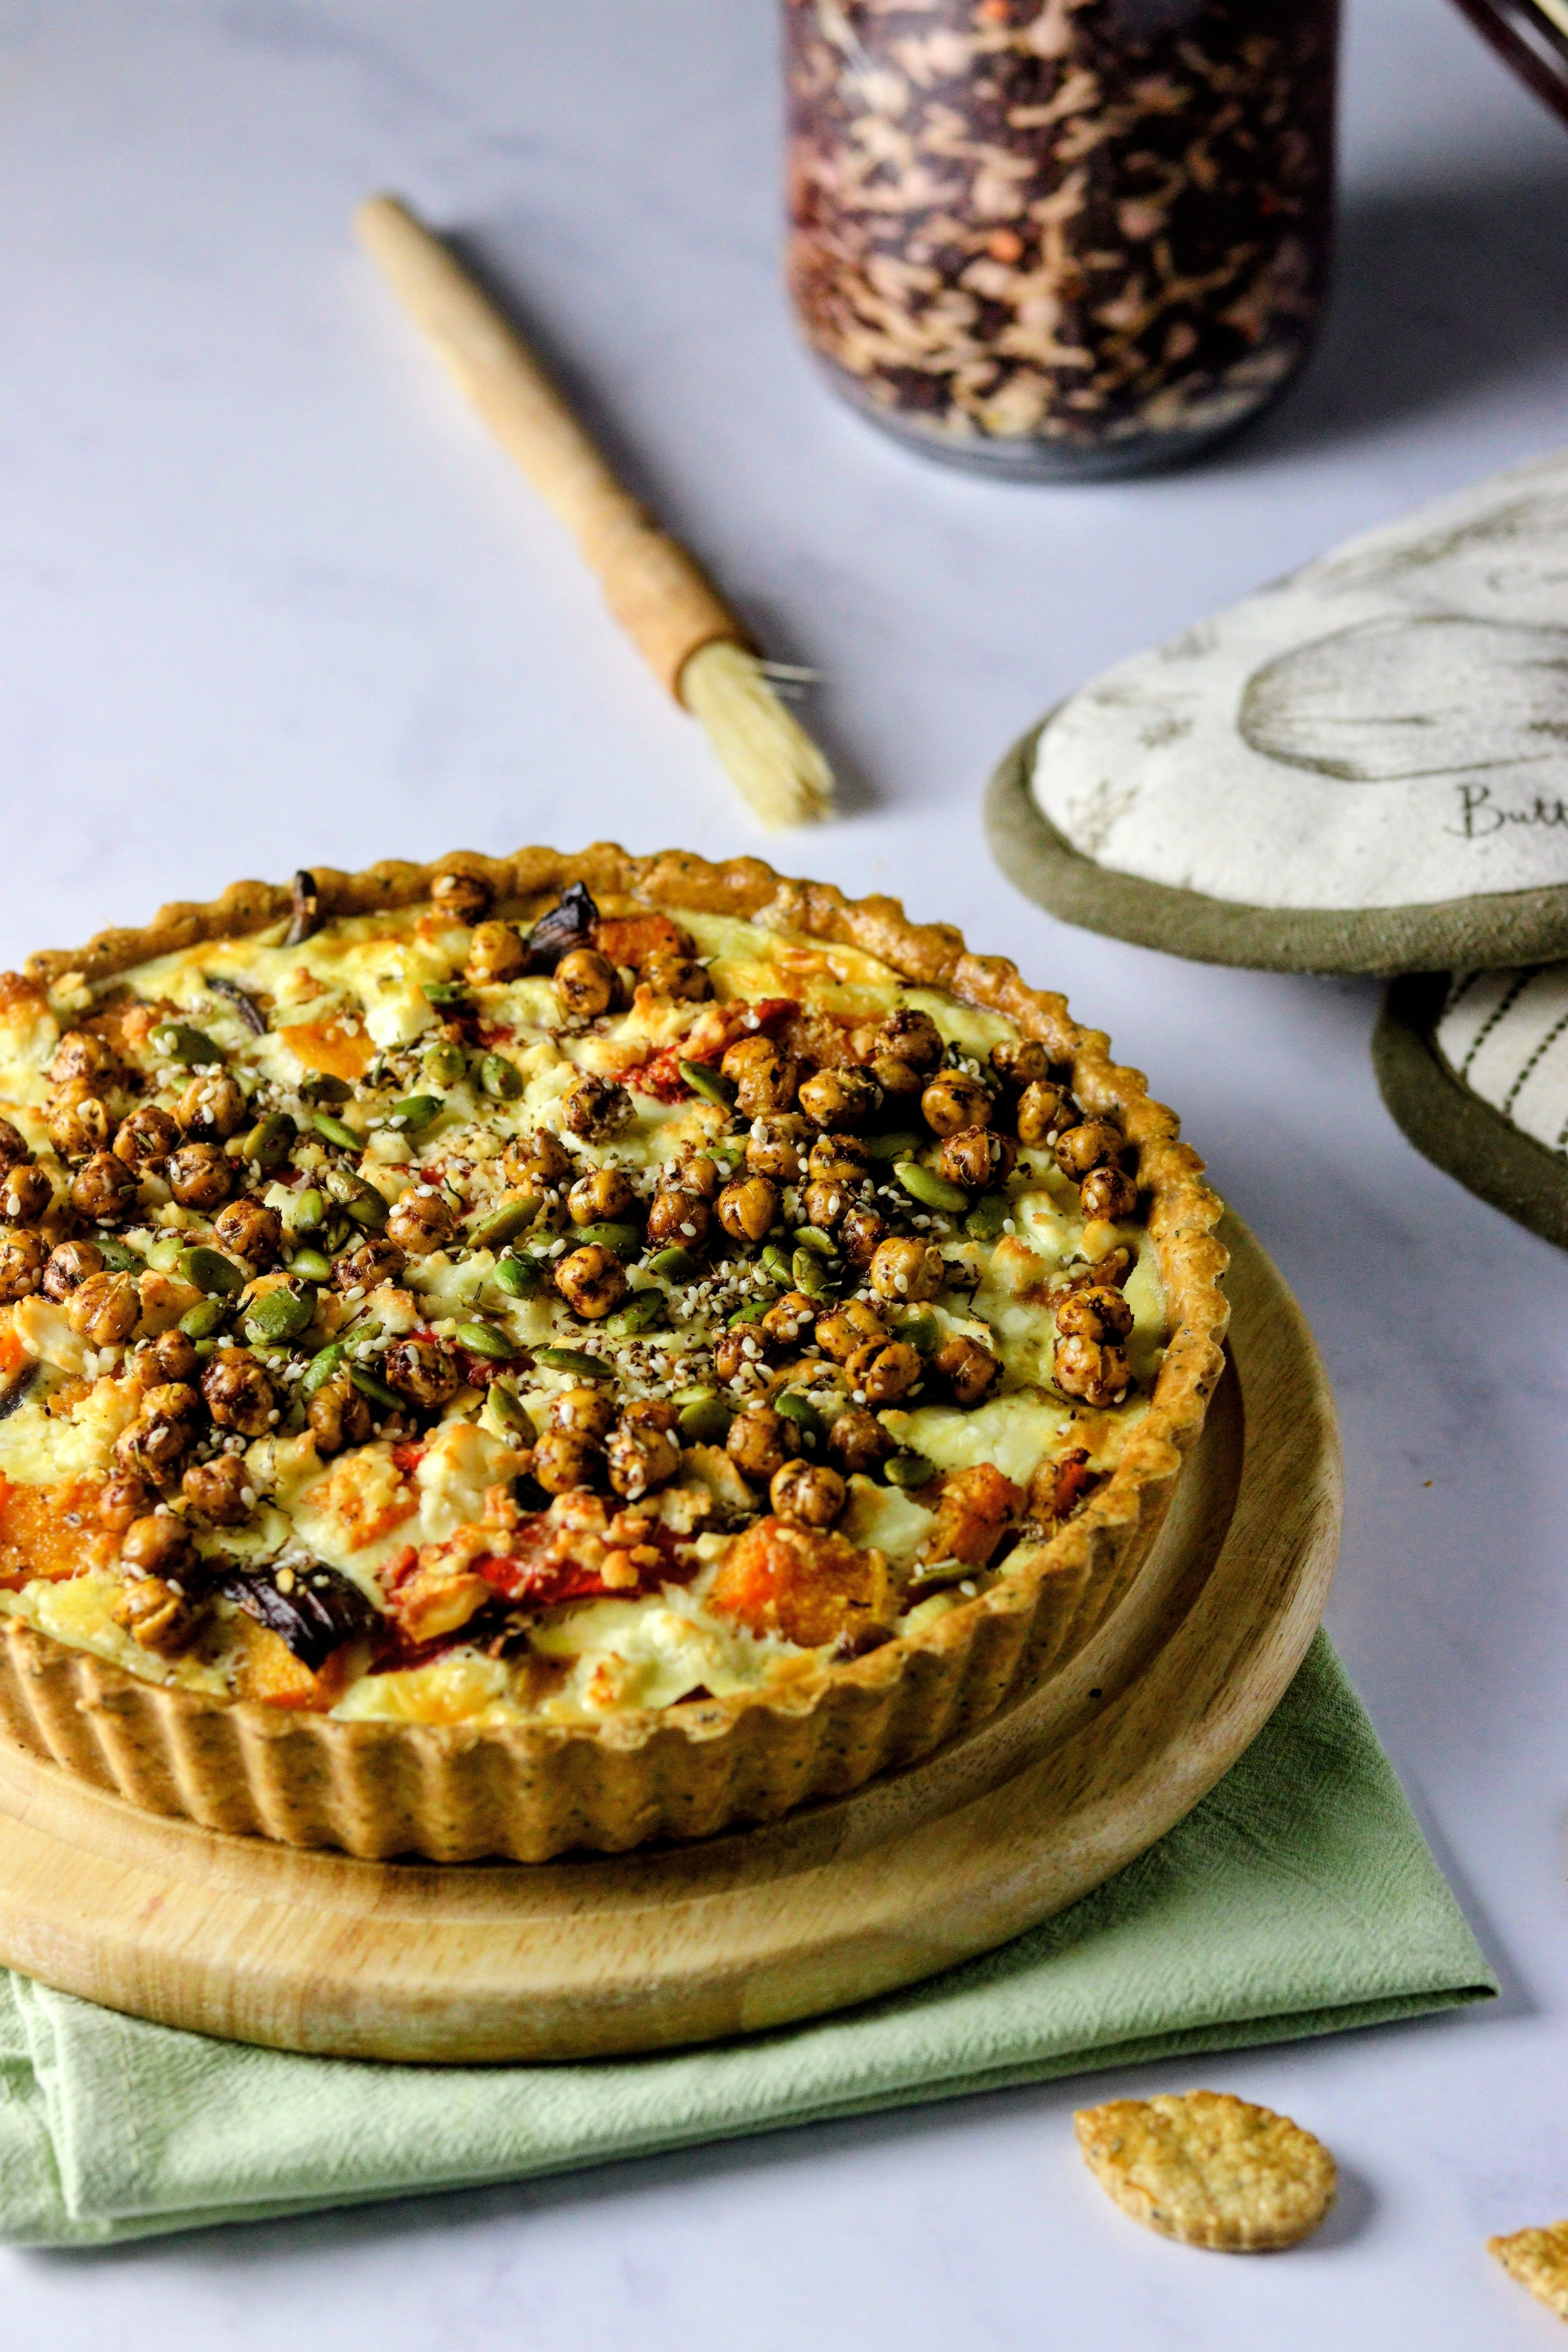
As a baker obsessed with trying new things, this tart may be the closest thing I have to a signature dish.
The idea to put Za’atar on a butternut tart isn't mine. It’s a suggestion in a Bake Off Book, for a butternut and goat’s cheese tart I have long been obsessed with. Over the years I have tweaked it, and changed it, and adapted it, until I had a version with more vegetables, less cream and cheese, higher fibre spelt pastry and more Za'atar flavour, with crispy chickpeas too!
I once served it at an afternoon tea for a client, and one of the guests told me it was “the best thing she had ever eaten.”
Before we get to the recipe, let's turn to this week's experiment…
My experiment this time came from the lovely Mark Thomas, who asked me about an online hack where you freeze a tart case or pie crust, and it eliminates the need for blind baking.
I knew freezing your case helps create a flakier pastry, but to eliminate blind baking completely was new for me. While this hack immediately made me think of soggy bottoms, if it did work, it would save any home baker a GREAT deal of time! So, definitely worth looking into while recipe testing this Butternut & Za’atar Tart.
The Results
My experiments have shown that for custard based tarts, such as a quiche or anything that involves pouring an egg mixture, this hack doesn't work.
I tested with two different custard based fillings - the Butternut & Za'atar Tart with spelt pastry, and a Blood Orange Custard Tart with sweet shortcrust.
Here's what happened when I put my fillings straight in the frozen tart case…
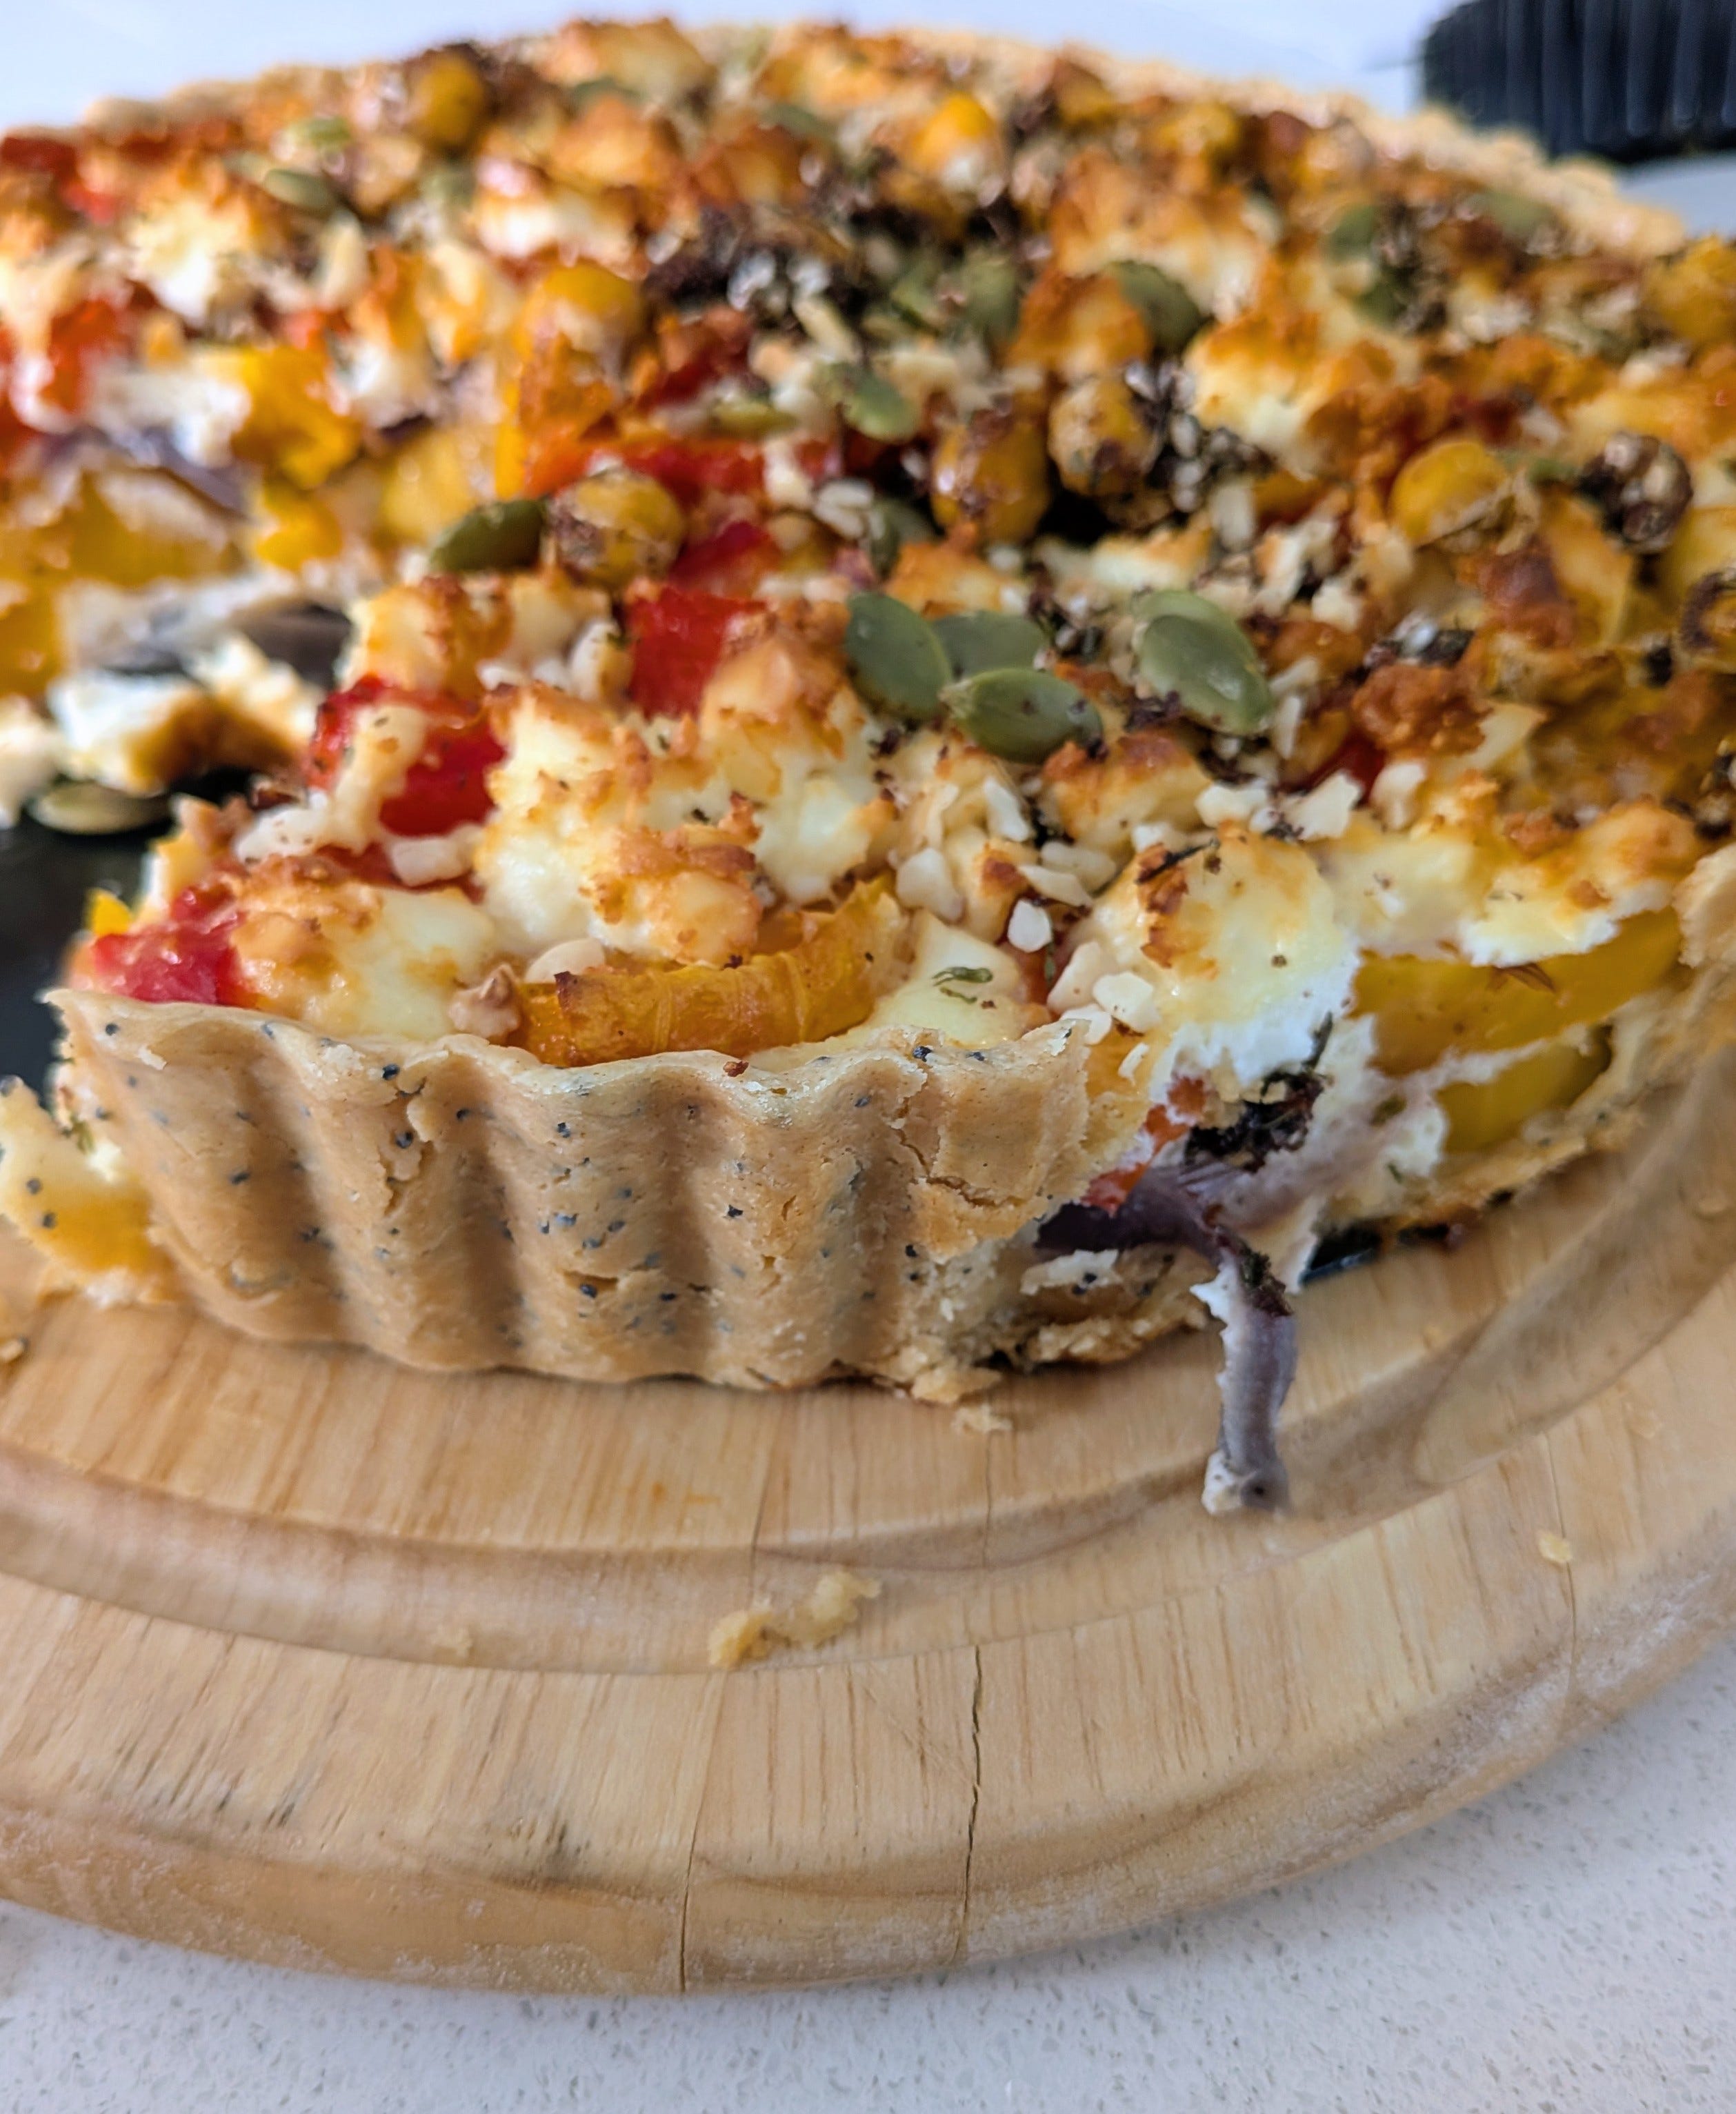
As you can see from these pictures and video, we are firmly in soggy bottom territory, with flabby, anaemic pastry. The pastry wasn't crisp and fell apart. It was quite hard to get both the tart and tartlets out of the case, and very challenging to slice.
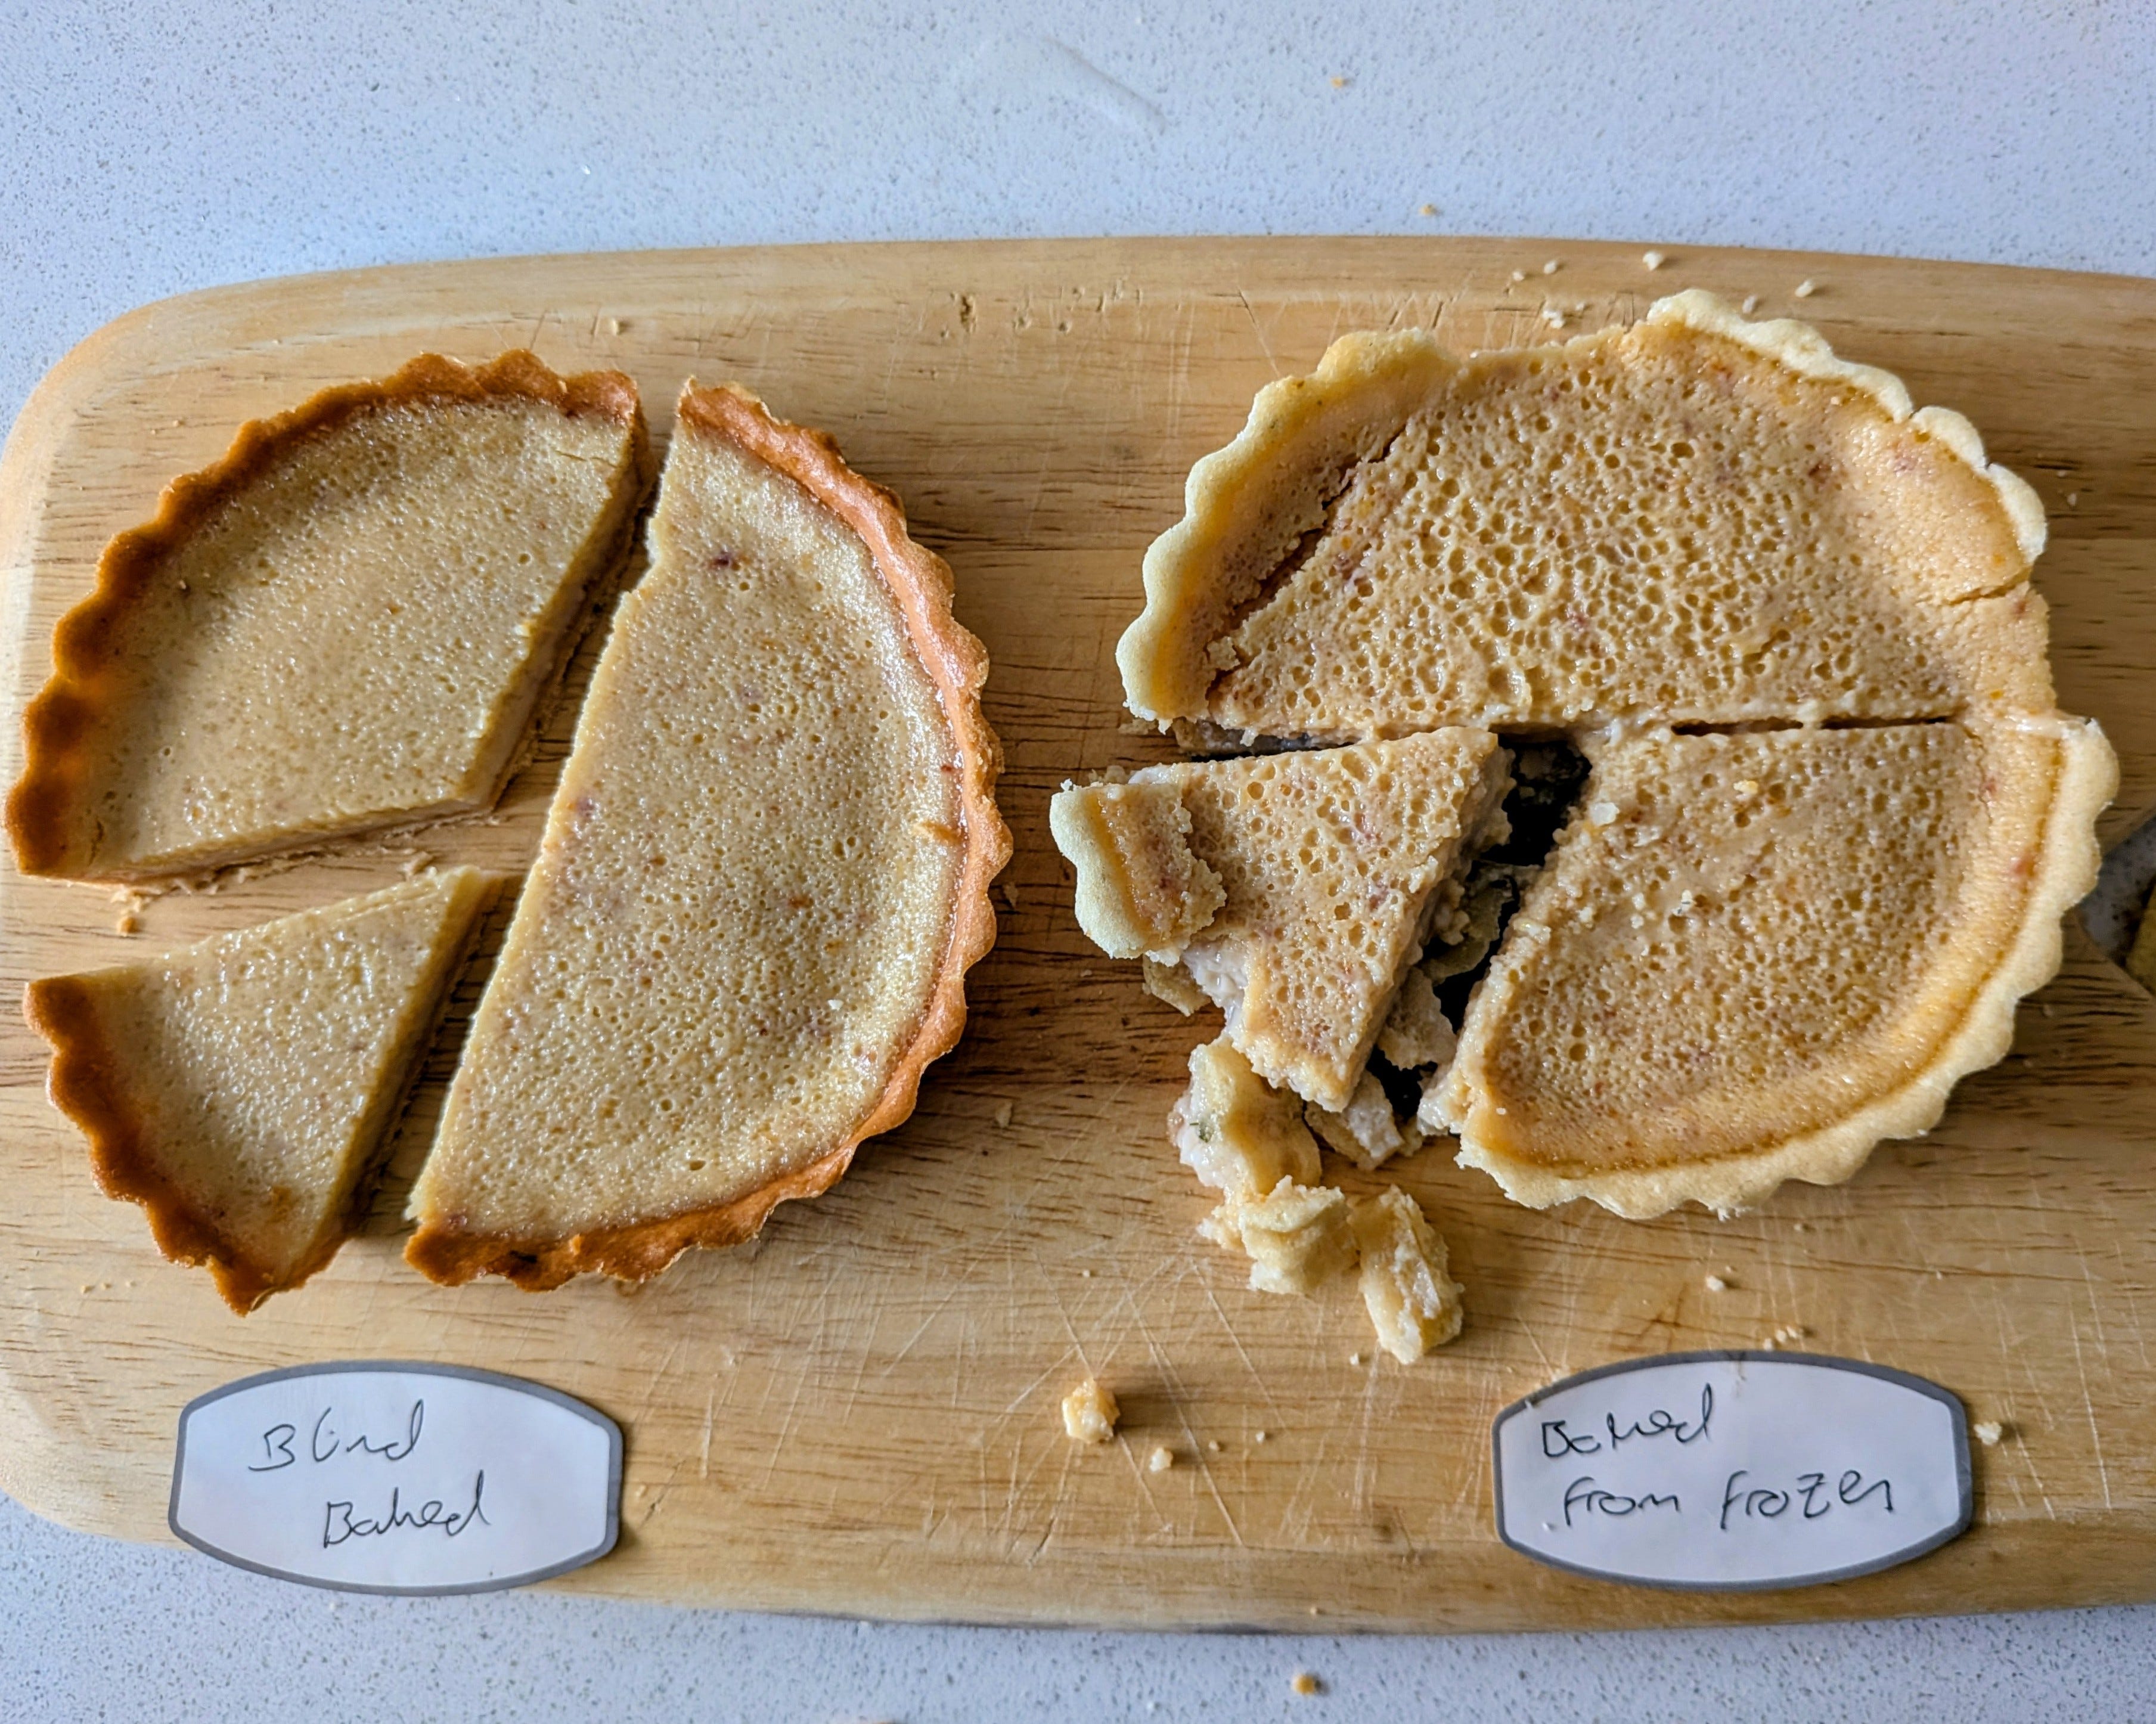
With the Blood Orange Custard Tartlet, you can see very clearly that the blind baked version is crisp and easier to handle.
So, there we have it. Two different pastry types, two different fillings, same soggy result.
In conclusion…
This freezing hack may work, but only for certain tarts and certainly not custard based ones.
YouTube cooking instructor Helen Rennie tells us that custard based fillings didn't work for her with the freezing hack either, because they are often baked at a lower temperature, meaning the pastry won't bake enough to be crisp. Whereas she found her plum tart, apple tart and onion, gruyere and tomato tart came out perfectly crisp, pointing out that you don't need to blind bake galettes or fruit pies.
Side note: For fruit pies and galettes, I often scatter ground nuts on the base, to protect the pastry from a soggy bottom and add flavour.
When it comes to a great custard based tart though, there are no shortcuts. Freezing certainly makes pastry flakier, but, for today's recipe, I will still be blind baking in the normal way.
Have you tried this hack? How did you get on with it? I would love to hear…
This post is free for three months. However, if you would like to become a paid subscriber, then thank you! I am most grateful.
You will receive full access to my recipe archive. And everything I personally earn on Substack, I donate to the World Central Kitchen.
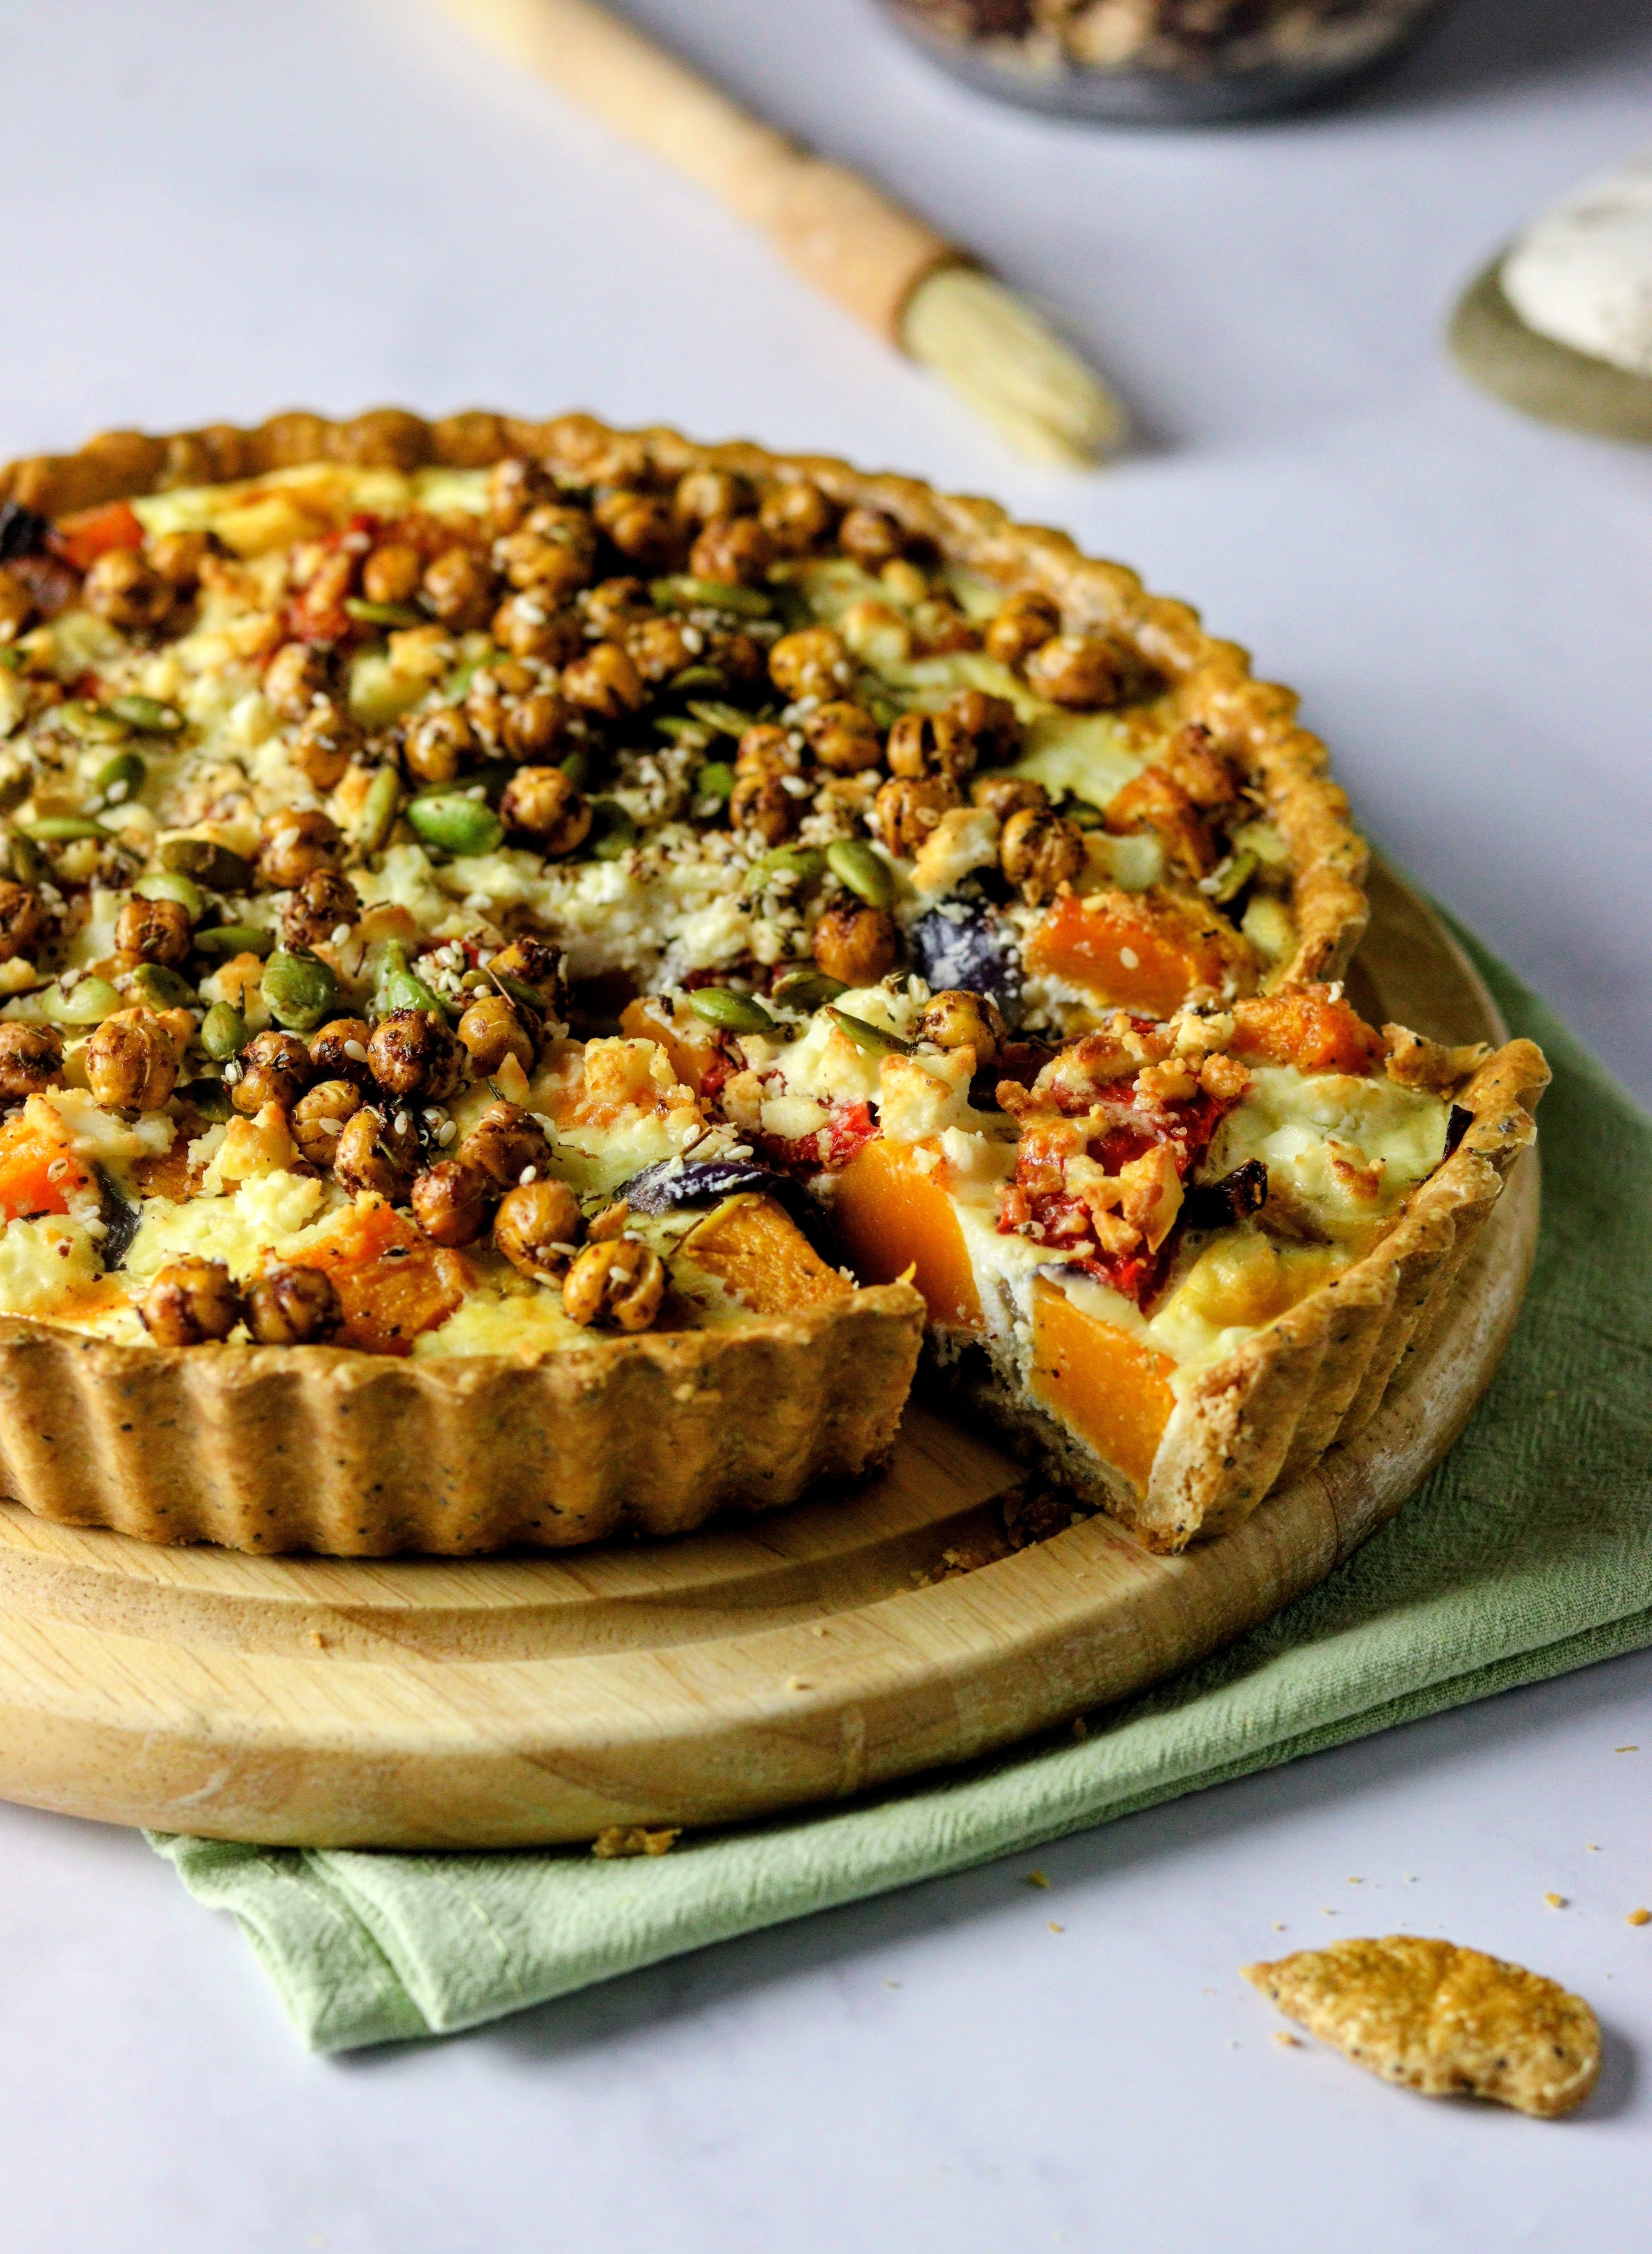
The Recipe - Butternut & Za’atar Tart
With this tart, the cherry on top for me, is the traditional Za’atar recipe generously given to me by my wonderful Egyptian friend, Nadine. She has kindly given me permission to share my personal adaptation. The original is quite a tricky preparation involving drying thyme from scratch. I wanted to make it easier for the home baker, while staying respectful to the principles of the original she gave me.
Bakers Notes
1) This recipe only requires 2 tbsp of crispy chickpeas. I appreciate no one is going to roast that small an amount of chickpeas. So, I recommend dry roasting up a whole tin at 180°C/160°C fan/356°F for 40-50 minutes. Keep the two tablespoons for your tart unsalted, and with the rest maybe try this fabulous recipe from Betty Williams for smoked paprika roasted chickpeas.
2) This tart uses a gloriously nutty and earthy spelt pastry. Spelt has a more fragile gluten structure than wheat, so spelt pastry is more susceptible to shrinking. It’s important to:
Use less liquid. Gradually add your egg until your dough comes together. You might not need all of it.
Not over handle or over work your pastry.
To rest your pastry and tart case well in the fridge or freezer.
Usually, I would leave some overhang, where you leave a 1-2cm edge of pastry around the top of the tart and slice it off after blind baking. But today, I want to encourage a little bit of shrinkage for a slightly shallower tart. I haven't gone bonkers, I just prefer this tart a bit shallower, so I haven't included the overhang method in the recipe today.
Level: Intermediate
Serves: 8-10 slices
Time: Approx. 2hrs, including 1.5 hrs resting time
Specialist Equipment Needed: 1x 23cm fluted tart case, 3.5cm deep
Ingredients:
For the spelt and poppy seed flour:
190g white spelt flour
40g wholemeal spelt flour
125g salted butter, fridge cold
1 tbsp poppy seeds
1 large egg, lightly whisked
For the filling:
400g butternut squash, chopped into 1cm chunks.
1 medium red onion, cut into wedges
2 tbsp olive oil
Pinch each of dried thyme and sumac
1 large roasted red pepper, taken from a jar
2 large eggs
175ml double cream
60g feta cheese
For the sprinkle:
2 tbsp pumpkin seeds, toasted
Plus your Za’atar Mix:
2 tbsp crispy chickpeas
1 heaped tsp sesame seeds, toasted
1/2 tsp dried thyme
1 tsp sumac - if you can, get hold of baladi sumac, Nadine tells me there’s nothing better.
1 tsp extra virgin olive oil
OR if you already have a jar of Za’atar, use 2 tsp mixed with 2 tbsp of crispy chickpeas
Method:
For the pastry blind bake:
Start with your pastry. Place your flours, and cold butter cubes in your mixer and mix until you have fine sandy crumb. You can also do this by hand, rubbing the butter into the flour with the tips of your fingers.
Add the poppy seeds. Gently, mix again.
Whisk your egg and gradually pour into your flour mixture. You might not need all the egg, and any leftovers can be used for your egg wash later.
Mix until the mixture becomes like a dough. This won’t take long, a minute or two at most.
If you don’t have a mixer, do this with a wooden spoon. But don’t overwork it.
Bring the dough together and place on some cling film. I avoid rolling my pastry into a ball, and roll it out to about 5mm thick. The idea behind this is you won’t have to roll it as much when it is rested. Wrap in film and rest in the fridge for at least an hour.
Once rested, it is time to line your tart case. Let the pastry come to room temperature before you start rolling.
Using a pastry brush and some melted butter, (or, I have found margarine works very well here), paint your case thoroughly, getting into all fluted nooks and crannies.
Then, take two sheets of baking parchment, and roll out your pastry to 2mm between them. No extra flour needed.
Another little aspect I like about this method is there is no fiddling around picking up your pastry with a rolling pin. You simply take the top sheet off and set it aside. Pick up your bottom baking sheet and transfer your rolled out pastry dough directly to your case, no touching pastry needed.
Using the knuckle of you index finger, gently and quickly work round the edges of the pastry case. Make sure the pastry fully fills the case to the corners. Then with your fingertip, gently push the pastry into each fluted edge.
Roll your rolling pin over the tart case to get rid of any excess pastry.
Wrap any excess in cling film and leave out of the fridge. You might need it later.
Get the tart back in the fridge, or freezer, to rest for another half hour.
Once rested, you will need to blind bake. (Even if you have frozen it!)
Preheat your oven to 180°C/160°C fan/356°F. Place a baking sheet in the oven as it preheats, for your tart to bake on. This little trick helps create a crisp bottom.
Scrunch up one of your old pieces of rolling parchment and use it to line the case. You’ll need some of parchment hanging out of the sides.
Now, for this recipe, I am using a technique where I allow a little bit of shrinkage as I prefer this tart slightly shallower. Using a mixture of lentils and rice, I filled it up until there is maybe a quarter of a centimetre left, as the image below shows.

Bake in the oven for 20 minutes.
Take it out and pick up all the sides of your baking paper to remove all lentils and rice.
If all the rawness hasn’t baked out of the base, prick it several times with a fork and pop it back in for another five minutes.
Meanwhile, either add a splash of boiled water and a pinch of salt to your leftover egg, or whisk up a new egg if you don't have any leftover.
Take your tart case out of the oven and check for any gaps or holes in the pastry. Fill these in with your excess pastry and then egg wash the entire tart.
Get it back in the oven for 10-15 minutes, until light golden brown.
Now, let’s get to the fillings!
While you are blind baking, tumble your butternut squash and red onions onto a baking tray. Drizzle them with a tbsp or two of extra virgin olive oil, a pinch of salt and pepper, and a pinch each of sumac and dried thyme. Mix until well coated and place in the oven for 30-40 minutes, alongside your blind baking tart.
While everything is baking, dry off your roasted red pepper with a kitchen towel and cut into strips.
Whisk together your eggs and cream in a jug. Season with salt and pepper.
Once your tart case is blind baked, and your butternut squash roasted, you can start pulling your tart together.
Pour your roasted butternut squash and onion wedges into the base of the tart, before topping with your red pepper strips and pouring over your egg and cream mixture, making sure your get into all the gaps.
Sprinkle over the feta and place back in the oven for 25-30 minutes.
You’ll know the tart is done because the edges will be slightly golden and the middle just set. I gently stick a small knife in the centre to make sure it isn’t too liquidy.
Pull out of the oven and leave to cool on a wire rack.
Now for your Za’atar mixture.
Mix 2 tbsp crispy chickpeas with your sumac, dried thyme, toasted sesame seeds, extra virgin olive oil, and a pinch of salt.
Sprinkle over your tart with your toasted pumpkin seeds.
Best slightly warm from the oven. Will last up to three days, covered in the fridge.
Until next time… when we’ll be getting back to our love of choux.
Have you heard about the Bake Experiments Recipe Index? An easily searchable one stop shop for all Bake Experiments recipes and experiments.
Well I’m pleased I didn’t have to go through a soggy bottom to test that hack. Your tart looks and sounds delicious Shell, I love the chickpeas for crunch and texture. A very pretty tart indeed.
You rate the hacks so we don't have to! Thank you!